React Native Setup
After completing the Rust setup and setting up either iOS setup or Android setup, you're ready to create a cross-platform project using React Native.
React Native is a JavaScript framework that enables developers to build native apps for multiple platforms with a single codebase.
In this tutorial, you will learn how to create a native Mopro module on both Android and iOS simulators.
You have 2 options to get started with a mopro React Native project:
Option 1: Clone the Repository and Import the Bindings
-
Clone the zkmopro/react-native-app repository
git clone https://github.com/zkmopro/react-native-app -
Install dependencies
npm install -
Run the app
npm run androidor
npm run ios
Option 2: Follow the Tutorial and Build a React Native Module
If you prefer a more hands-on approach and wish to understand how everything works, you can follow the tutorial to build a React Native module from scratch.
1. Initializing a New React Native Project or Using an Existing One
-
Getting started with React Native: Official documentation
infoThe Expo framework is recommended by the React Native community. (Last updated on Aug 15, 2024)
We will use the Expo framework throughout this documentation.
Ref: Start a new React Native project with Expo -
After creating a React Native project, you should be able to run with a commands like
npm run iosfor iOS simulators. And
npm run androidfor Android emulators.
2. Creating a Native Module
-
Creating a native module by the command
npx create-expo-module --local moproIt will create a native module named
moproin themodules/moprofolder.
3. Define an API
-
Define the types for the native module. Add the following types in the file:
/modules/mopro/index.ts// Define the G1 type
export type G1 = {
x: string;
y: string;
};
// Define the G2 type
export type G2 = {
x: string[];
y: string[];
};
// Define the ProofCalldata type
export type ProofCalldata = {
a: G1;
b: G2;
c: G1;
};
// Define the Result type
export type Result = {
proof: ProofCalldata;
inputs: string[];
}; -
Add the native module's API functions in the same file.
/modules/mopro/index.tsexport function generateCircomProof(
zkeyPath: string,
circuitInputs: { [key: string]: string[] }
): Result {
return MoproModule.generateCircomProof(zkeyPath, circuitInputs);
}
4. Implement the module on Android
4-1. Add dependency for jna in the file build.gradle.
dependencies {
  implementation("net.java.dev.jna:jna:5.13.0@aar")
}
4-2. Include Mopro bindings in the native Android module
- Get the
MoproAndroidBindingsfromcargo run --bin android.infoSee Rust Setup
- Move the
jniLibsdirectory tomodules/mopro/android/src/main/.
And moveuniffidirectory tomodules/mopro/android/src/main/java/.
The folder structure should be as follows:modules/mopro/android/src/main
├── AndroidManifest.xml
├── assets
├── java
│ ├── expo
│ │ └── modules
│ │ └── mopro
│ │ ├── MoproModule.kt
│ │ └── MoproView.kt
│ └── uniffi
│ └── mopro
│ └── mopro.kt
└── jniLibs
├── arm64-v8a
│ └── libuniffi_mopro.so
├── armeabi-v7a
│ └── libuniffi_mopro.so
├── x86
│ └── libuniffi_mopro.so
└── x86_64
└── libuniffi_mopro.so
4-3. Create convertible types for Javascript library with kotlin.
It is a better way to represent a JavaScript object with the native type safety.
- Create a new file called
MoproType.ktin the following folder:modules/mopro/android/src/main/java/expo/modules/mopro/
package expo.modules.mopro

import expo.modules.kotlin.records.Field
import expo.modules.kotlin.records.Record

class ExpoG1 : Record {
    @Field var x: String?

    @Field var y: String?

    constructor(_x: String, _y: String) {
        x = _x
        y = _y
    }
}

class ExpoG2 : Record {
    @Field var x: List<String>?

    @Field var y: List<String>?

    constructor(_x: List<String>, _y: List<String>) {
        x = _x
        y = _y
    }
}

class ExpoProof : Record {
    @Field var a: ExpoG1?

    @Field var b: ExpoG2?

    @Field var c: ExpoG1?

    constructor(_a: ExpoG1, _b: ExpoG2, _c: ExpoG1) {
        a = _a
        b = _b
        c = _c
    }
}

class Result : Record {
    @Field var proof: ExpoProof?

    @Field var inputs: List<String>?

    constructor(_proof: ExpoProof, _inputs: List<String>) {
        proof = _proof
        inputs = _inputs
    }
}
Ref: Records
4-4. Create native module implementation in MoproModule.kt
package expo.modules.mopro

import expo.modules.kotlin.modules.Module
import expo.modules.kotlin.modules.ModuleDefinition
import java.io.File
import uniffi.mopro.ProofCalldata
import uniffi.mopro.generateCircomProof
import uniffi.mopro.toEthereumInputs
import uniffi.mopro.toEthereumProof

fun convertType(proof: ProofCalldata): ExpoProof {
  var a = ExpoG1(proof.a.x, proof.a.y)
  var b = ExpoG2(proof.b.x, proof.b.y)
  var c = ExpoG1(proof.c.x, proof.c.y)
  var output = ExpoProof(a, b, c)
  return output
}

fun generateProof(zkeyPath: String, circuitInputs: Map<String, List<String>>): Result {
  val file = File(zkeyPath)
  val res = generateCircomProof(file.absolutePath, circuitInputs)
  val proof = toEthereumProof(res.proof)
  val inputs = toEthereumInputs(res.inputs)
  val result = Result(convertType(proof), inputs)
  return result
}

class MoproModule : Module() {
  // Each module class must implement the definition function. The definition consists of components
  // that describes the module's functionality and behavior.
  // See https://docs.expo.dev/modules/module-api for more details about available components.
  override fun definition() = ModuleDefinition {
    // Sets the name of the module that JavaScript code will use to refer to the module. Takes a
    // string as an argument.
    // Can be inferred from module's class name, but it's recommended to set it explicitly for
    // clarity.
    // The module will be accessible from `requireNativeModule('Mopro')` in JavaScript.
    Name("Mopro")

    Function("generateCircomProof") { zkeyPath: String, circuitInputs: Map<String, List<String>> ->
      generateProof(zkeyPath, circuitInputs)
    }

    View(MoproView::class) {
      // Defines a setter for the `name` prop.
      Prop("name") { view: MoproView, prop: String -> println(prop) }
    }
  }
}
5. Implement the module on iOS
5.1 Use a framework
-
Get the
MoproiOSBindingsfromcargo run --bin ios.infoSee Rust Setup
-
Copy the
MoproiOSBindingsdirectory tomodules/mopro/ios -
Bundle the bindings in
Mopro.podspec/modules/mopro/ios/Mopro.podspec...
s.dependency 'ExpoModulesCore'
s.vendored_frameworks = 'MoproiOSBindings/MoproBindings.xcframework'
...
5.2 Create convertible types for Javascript library with swift.
-
Create a new file called
MoproType.swiftin the following folder:modules/mopro/ios/modules/mopro/ios/MoproType.swiftimport ExpoModulesCore
struct ExpoG1: Record {
@Field
var x: String?
@Field
var y: String?
}
struct ExpoG2: Record {
@Field
var x: [String]?
@Field
var y: [String]?
}
struct ExpoProof: Record {
@Field
var a: ExpoG1?
@Field
var b: ExpoG2?
@Field
var c: ExpoG1?
}
struct Result: Record {
@Field
var inputs: [String]?
@Field
var proof: ExpoProof?
}
5-3. Create native module implementation in MoproModule.swift
import ExpoModulesCore
import moproFFI

func convertType(proof: ProofCalldata) -> ExpoProof {
  var a = ExpoG1()
  a.x = proof.a.x
  a.y = proof.a.y

  var b = ExpoG2()
  b.x = proof.b.x
  b.y = proof.b.y

  var c = ExpoG1()
  c.x = proof.c.x
  c.y = proof.c.y

  var expoProof = ExpoProof()
  expoProof.a = a
  expoProof.b = b
  expoProof.c = c
  return expoProof
}

func generateProof(zkeyPath: String, circuitInputs: [String: [String]]) -> Result {
  do {
    let res = try generateCircomProof(zkeyPath: zkeyPath, circuitInputs: circuitInputs)
    let proof = toEthereumProof(proof: res.proof)
    let result = Result()
    result.inputs = toEthereumInputs(inputs: res.inputs)
    result.proof = convertType(proof: proof)
    return result
  } catch {
    print("Error: \(error)")
    let result = Result()
    return result
  }
}

public class MoproModule: Module {
  // Each module class must implement the definition function. The definition consists of components
  // that describes the module's functionality and behavior.
  // See https://docs.expo.dev/modules/module-api for more details about available components.
  public func definition() -> ModuleDefinition {
    // Sets the name of the module that JavaScript code will use to refer to the module. Takes a string as an argument.
    // Can be inferred from module's class name, but it's recommended to set it explicitly for clarity.
    // The module will be accessible from `requireNativeModule('Mopro')` in JavaScript.
    Name("Mopro")

    Function("generateCircomProof") {
      (zkeyPath: String, circuitInputs: [String: [String]]) -> Result in

      // Call into the compiled static library
      return generateProof(zkeyPath: zkeyPath, circuitInputs: circuitInputs)
    }

    // Enables the module to be used as a native view. Definition components that are accepted as part of the
    // view definition: Prop, Events.
    View(MoproView.self) {
      // Defines a setter for the `name` prop.
      Prop("name") { (view: MoproView, prop: String) in
        print(prop)
      }
    }
  }
}
6. Run the app
6.1 Install expo-asset
Install expo-asset to use assets.
npx expo install expo-asset
6.2 Check the expo command
The android and ios script should be as follows:
{
    ...
    "scripts": {
        ...
        "android": "expo run:android",
        "ios": "expo run:ios",
        ...
    }
    ...
}
6.3 Create an example view
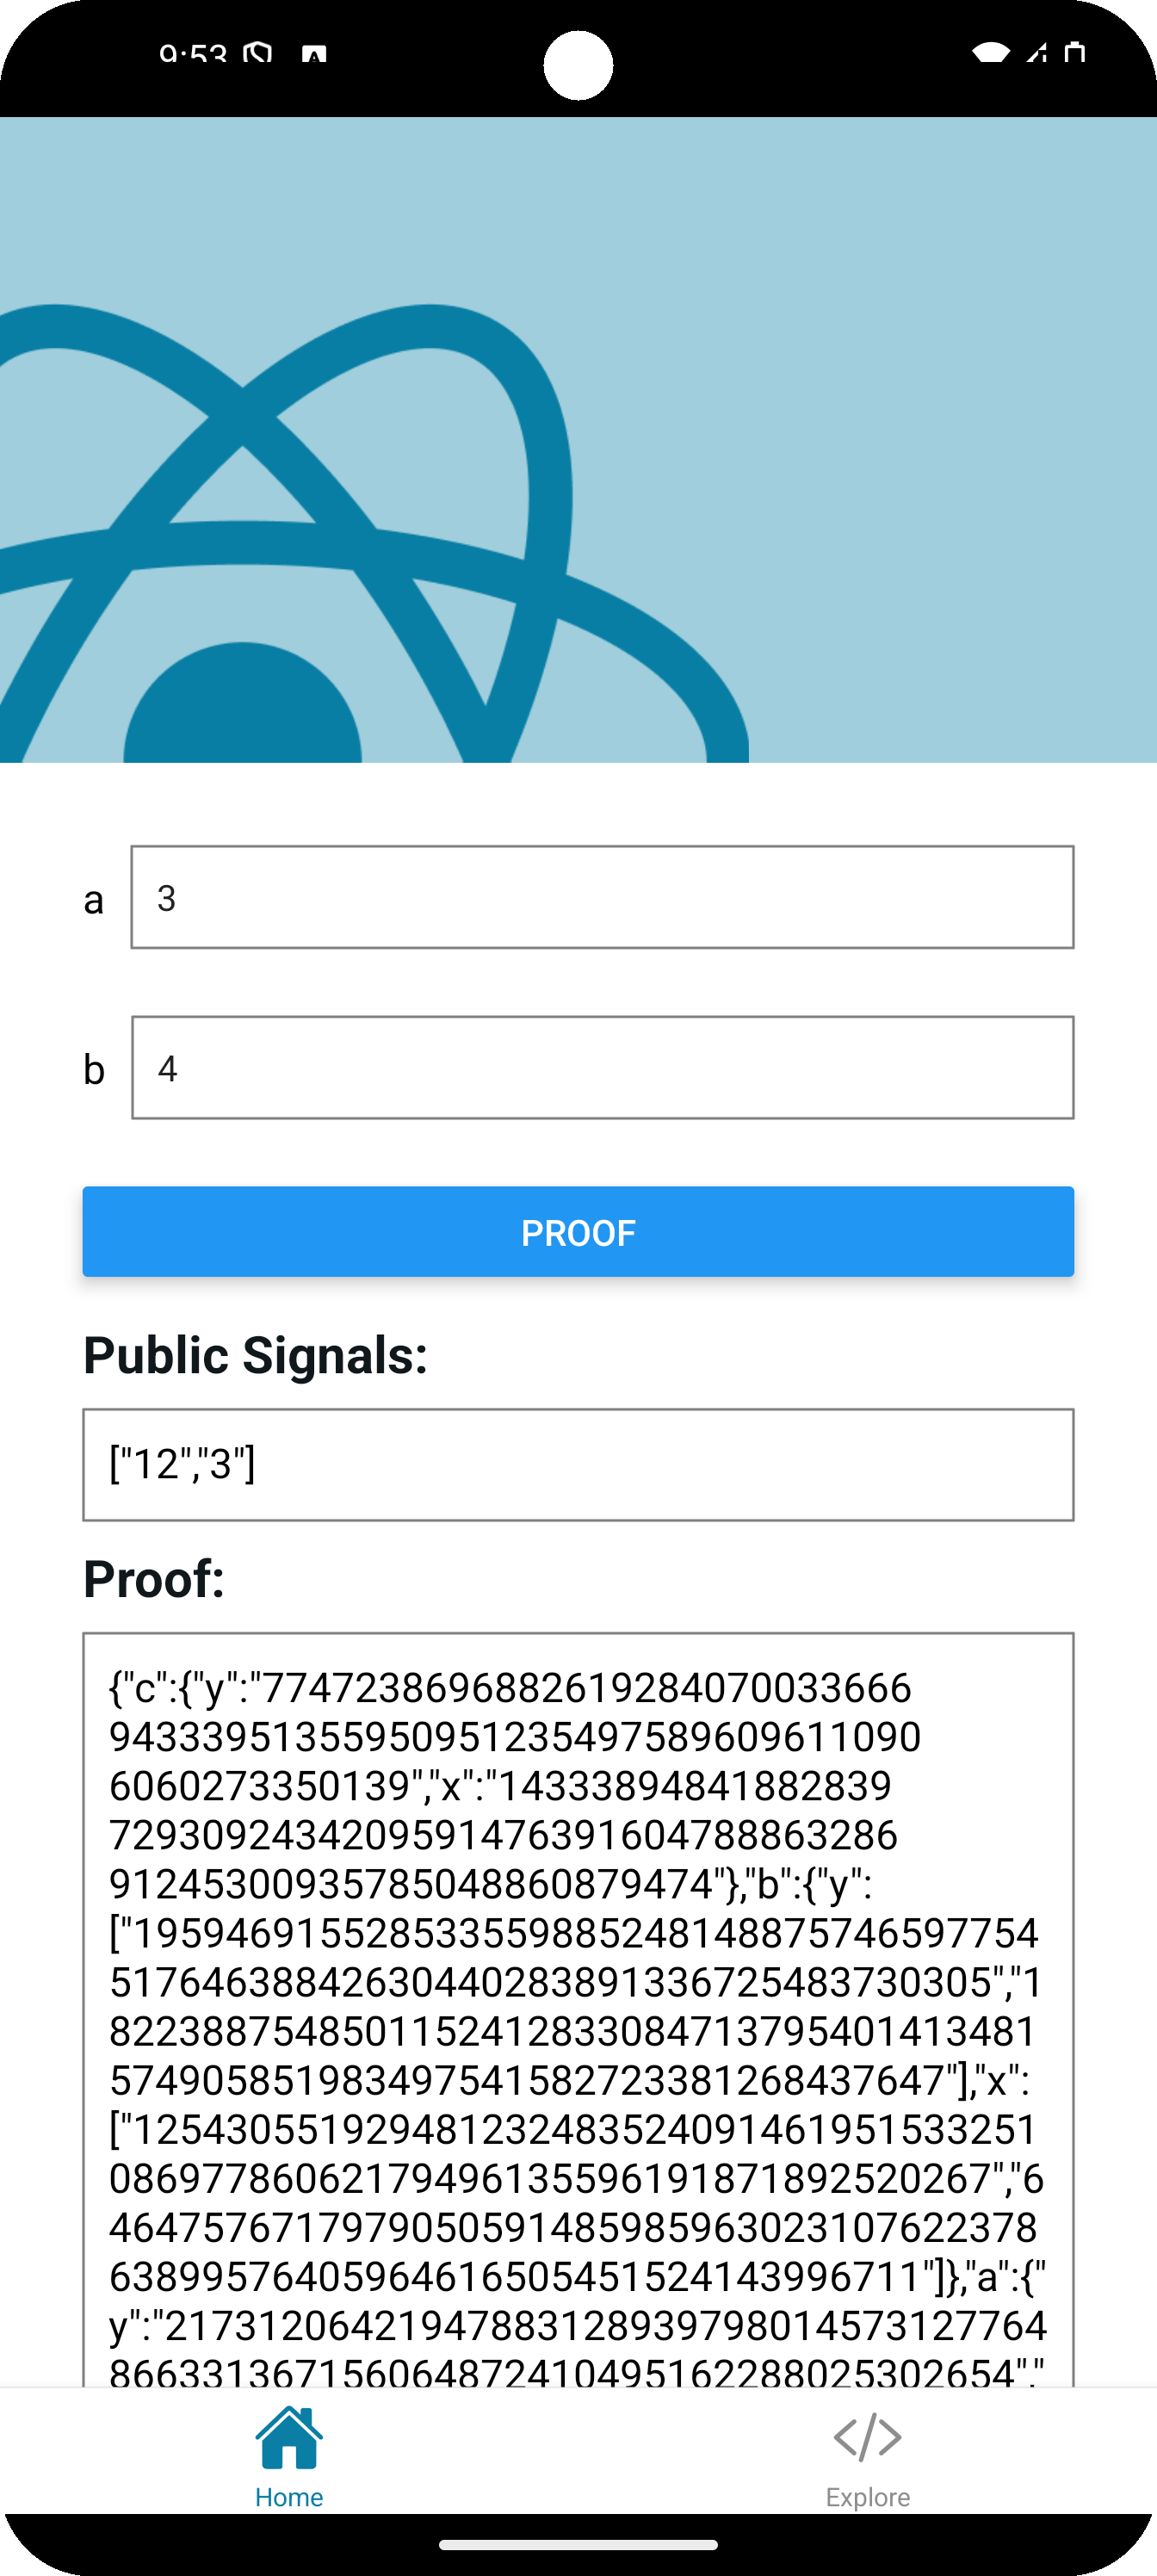
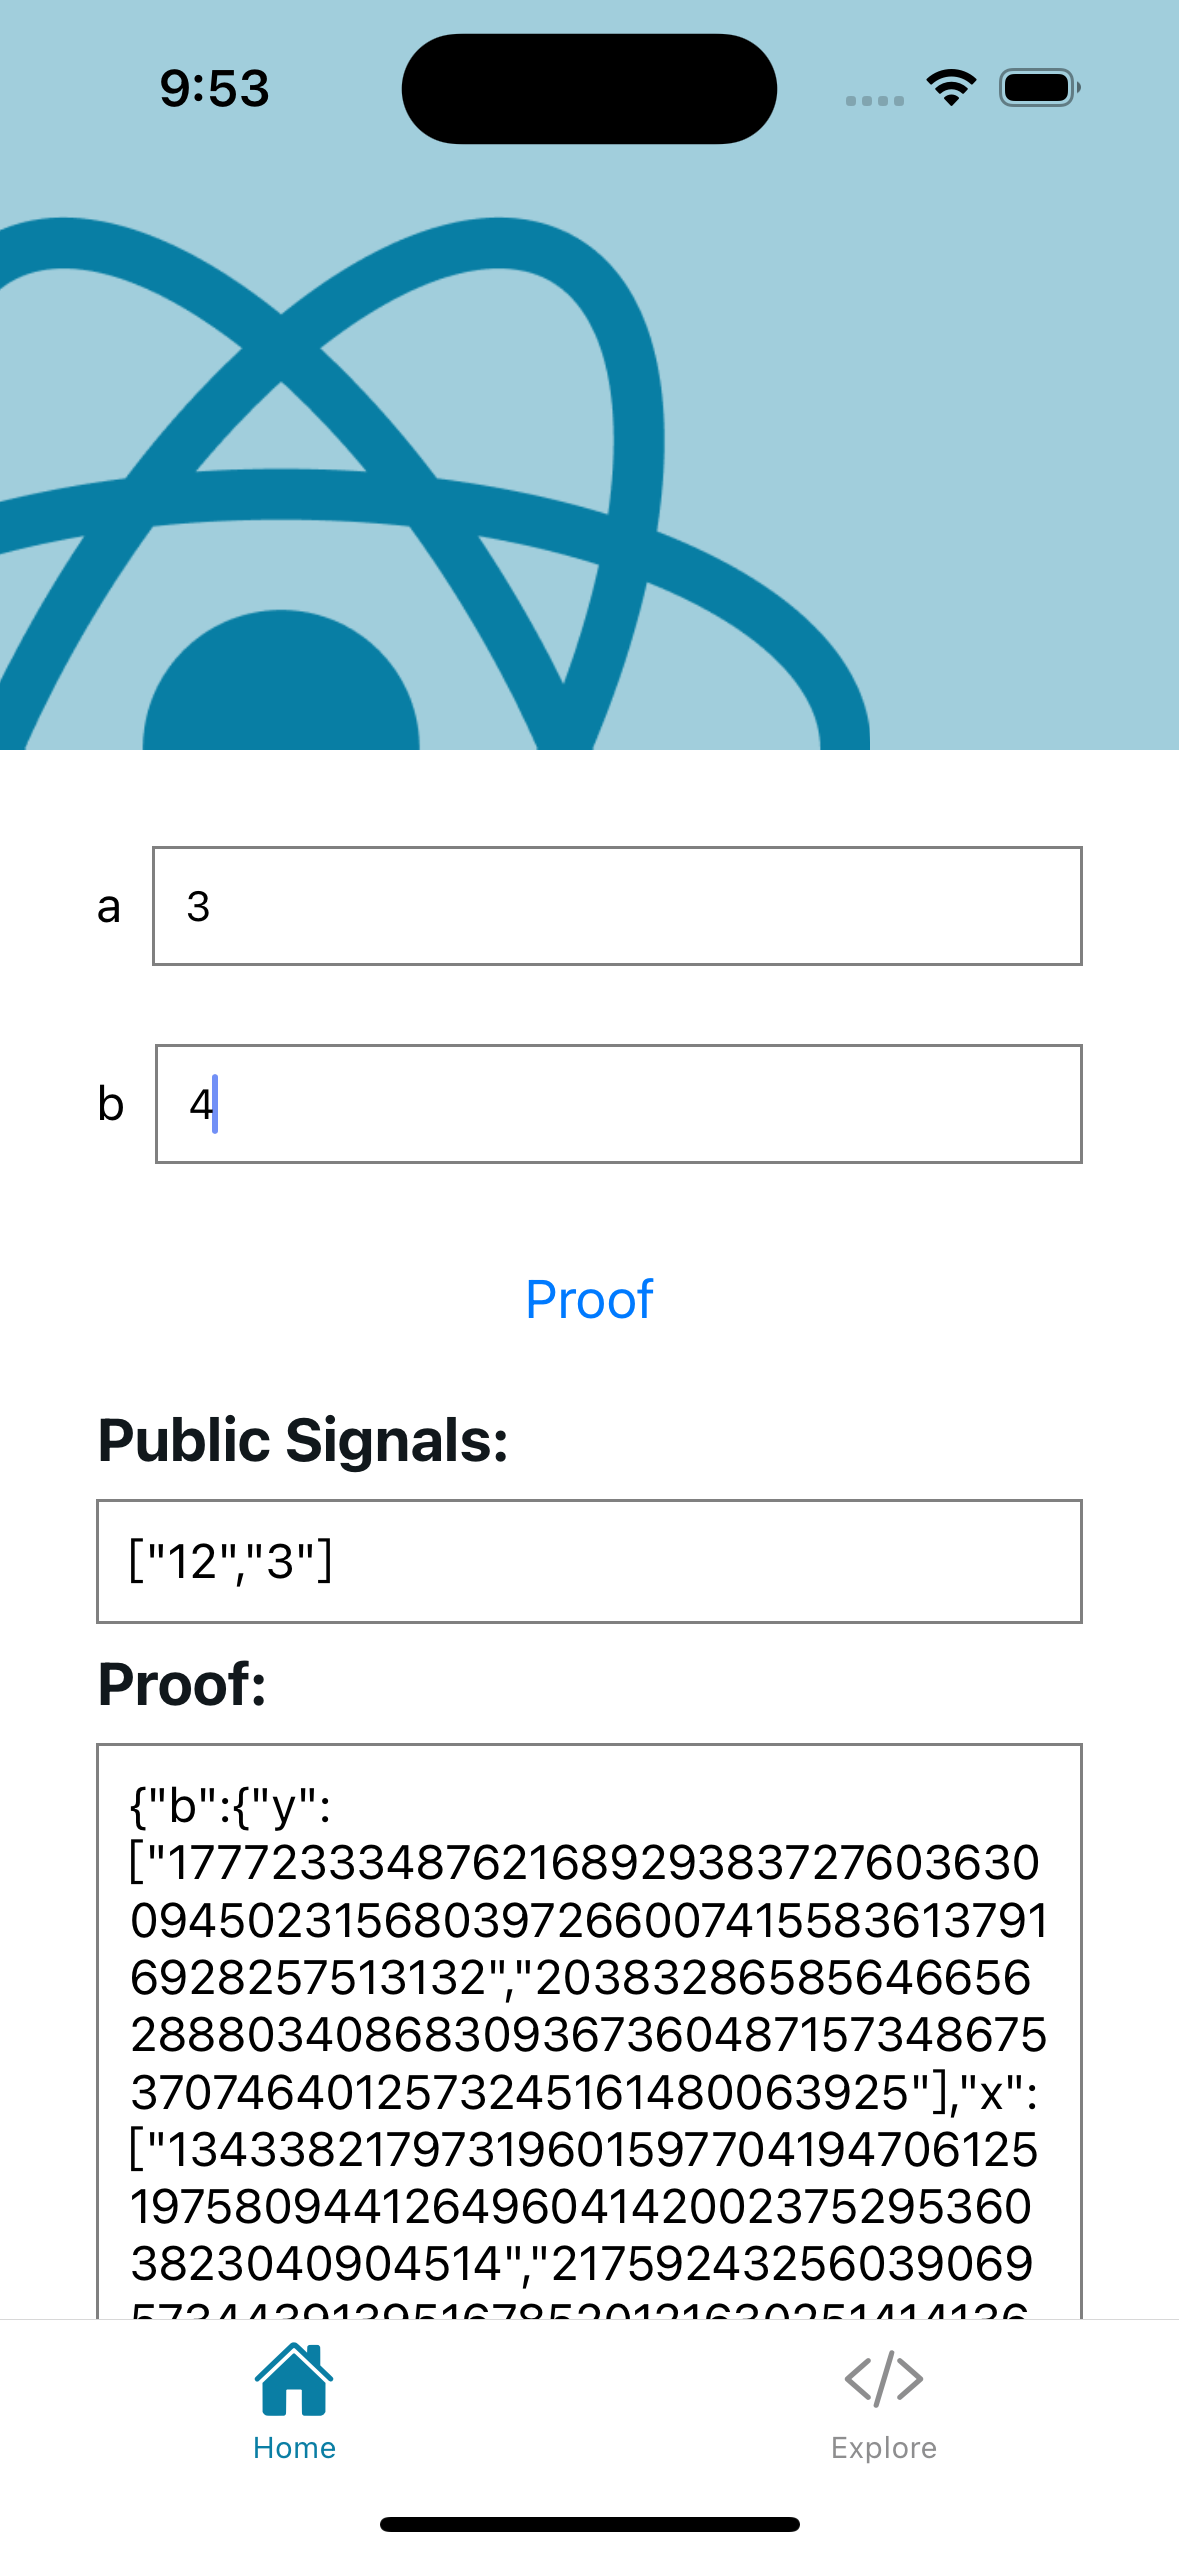
This view enables users to generate multiplier2 proofs and the public signals.
import { Image, StyleSheet, Button, TextInput, View, Text } from "react-native";

import ParallaxScrollView from "@/components/ParallaxScrollView";
import { ThemedText } from "@/components/ThemedText";
import { ThemedView } from "@/components/ThemedView";
import { generateCircomProof, Result } from "@/modules/mopro";
import * as FileSystem from "expo-file-system";
import { useState } from "react";
import { Asset } from "expo-asset";

export default function HomeScreen() {
    const [a, setA] = useState("");
    const [b, setB] = useState("");
    const [inputs, setInputs] = useState<string>("");
    const [proof, setProof] = useState<string>("");
    async function genProof(): Promise<void> {
        const asset = Asset.fromURI(
            "https://ci-keys.zkmopro.org/multiplier2_final.zkey"
        );
        const newFileName = "multiplier2_final.zkey";
        const newFilePath = `${FileSystem.documentDirectory}${newFileName}`;
        const fileInfo = await FileSystem.getInfoAsync(newFilePath);
        if (!fileInfo.exists) {
            try {
                const file = await asset.downloadAsync();
                if (file.localUri === null) {
                    throw new Error("Failed to download the file");
                }
                await FileSystem.moveAsync({
                    from: file.localUri,
                    to: newFilePath,
                });
            } catch (error) {
                console.error("Error renaming the file:", error);
            }
        }
        const circuitInputs = {
            a: [a],
            b: [b],
        };
        const res: Result = generateCircomProof(
            newFilePath.replace("file://", ""),
            circuitInputs
        );
        setProof(JSON.stringify(res.proof));
        setInputs(JSON.stringify(res.inputs));
    }
    return (
        <ParallaxScrollView
            headerBackgroundColor={{ light: "#A1CEDC", dark: "#1D3D47" }}
            headerImage={
                <Image
                    source={require("@/assets/images/partial-react-logo.png")}
                    style={styles.reactLogo}
                />
            }
        >
            <View style={styles.inputContainer}>
                <Text style={styles.label}>a</Text>
                <TextInput
                    style={styles.input}
                    placeholder="Enter value for a"
                    value={a}
                    onChangeText={setA}
                    keyboardType="numeric"
                />
            </View>
            <View style={styles.inputContainer}>
                <Text style={styles.label}>b</Text>
                <TextInput
                    style={styles.input}
                    placeholder="Enter value for b"
                    value={b}
                    onChangeText={setB}
                    keyboardType="numeric"
                />
            </View>
            <Button title="Proof" onPress={() => genProof()} />
            <ThemedView style={styles.stepContainer}>
                <ThemedText type="subtitle">Public Signals:</ThemedText>
                <Text style={styles.output}>{inputs}</Text>
                <ThemedText type="subtitle">Proof:</ThemedText>
                <Text style={styles.output}>{proof}</Text>
            </ThemedView>
        </ParallaxScrollView>
    );
}

const styles = StyleSheet.create({
    stepContainer: {
        gap: 8,
        marginBottom: 8,
    },
    input: {
        height: 40,
        borderColor: "gray",
        borderWidth: 1,
        flex: 1,
        paddingHorizontal: 10,
    },
    inputContainer: {
        flexDirection: "row",
        alignItems: "center",
        marginBottom: 10,
    },
    label: {
        fontSize: 16,
        marginRight: 10,
    },
    reactLogo: {
        height: 178,
        width: 290,
        bottom: 0,
        left: 0,
        position: "absolute",
    },
    output: {
        fontSize: 16,
        borderColor: "gray",
        borderWidth: 1,
        padding: 10,
    },
});
6.4 Run in simulators
- Android
npm run android
Trouble Shooting: If it shows
FAILURE: Build failed with an exception.

* What went wrong:
Could not determine the dependencies of task ':app:compileDebugJavaWithJavac'.
> SDK location not found. Define a valid SDK location with an ANDROID_HOME environment variable or by setting the sdk.dir path in your project's local properties file at '.../android/local.properties'.
Add the ANDROID_HOME environment variable by following the prerequisites.
- iOS
npm run ios