Android Setup
This tutorial will guide you through integrating the Android bindings into an Android Studio project. Before you begin, make sure you’ve completed the "Getting Started - 3. Mopro build" process with selecting Android platform and have the MoproAndroidBindings folder ready:
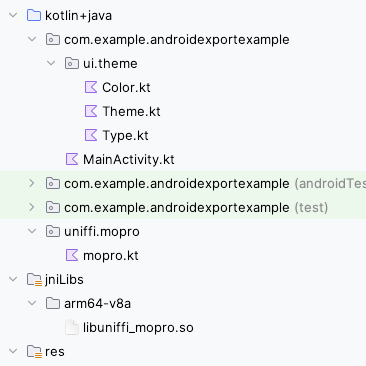
MoproAndroidBindings
├── jniLibs
│   ├── arm64-v8a
│   ├── armeabi-v7a
│   ├── x86
│   └── x86_64
└── uniffi
    └── mopro
        └── mopro.kt
Watch the demo video below for a step-by-step guide to integrating the bindings into Android Studio, or follow the written instructions that follow.
In this example, we use Circom circuits and their corresponding .zkey files. The process is similar for other provers.
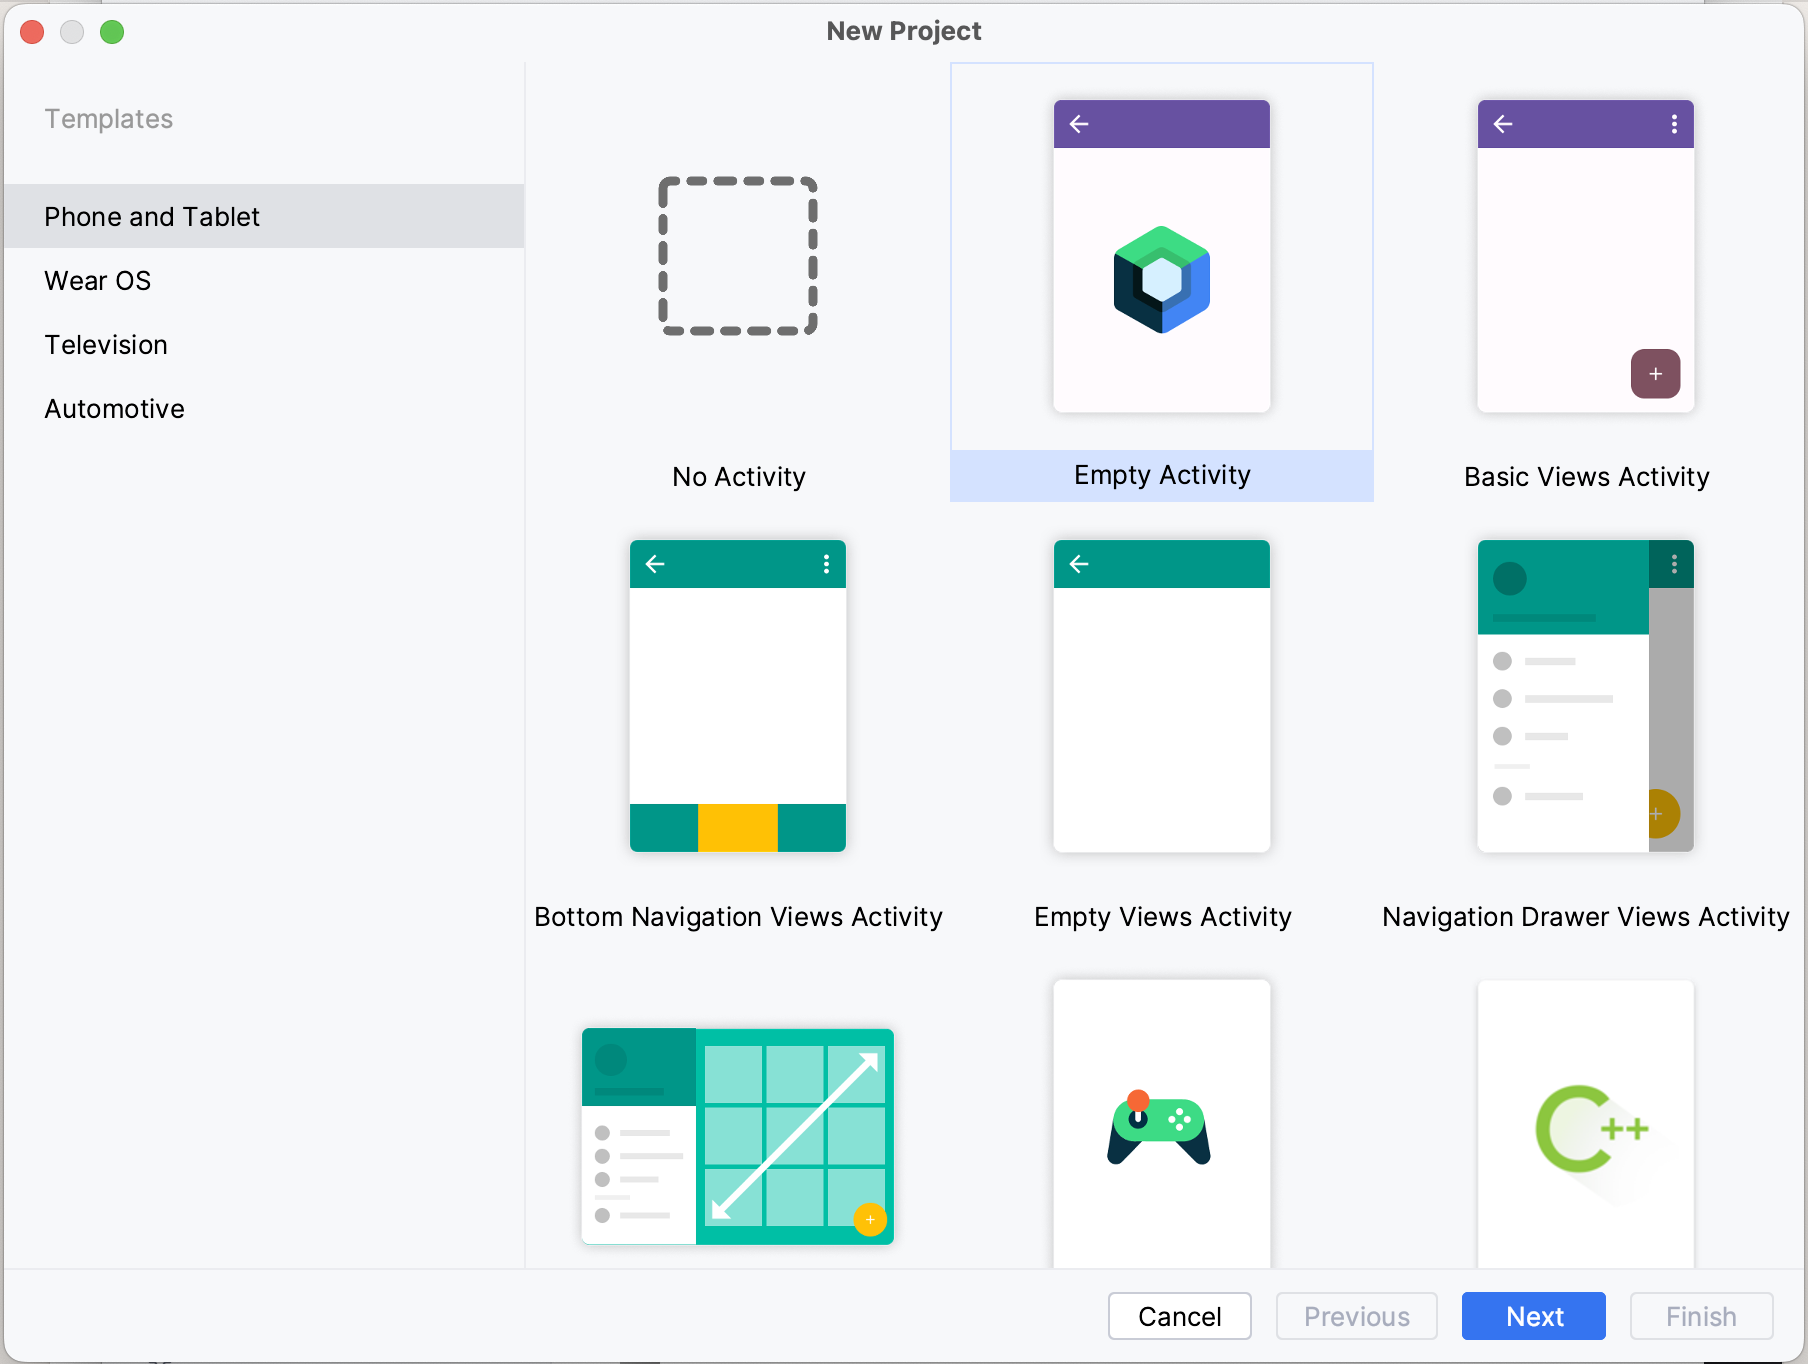
0. Initialize an Android Studio project
We will create an android app through Android Studio. If you already have an app project, you can skip this step. We'll do File -> New -> New Project and create an Empty Activity. We suggest putting this Android project inside the rust project folder created above.
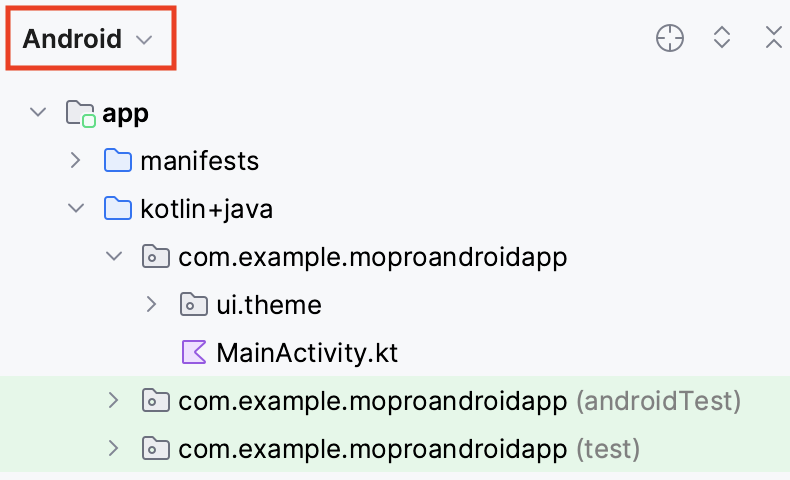
Your android project should be opened now.
Please make sure you choose the Android view like this.
1. Add dependencies
Then add jna to app/build.gradle.kts
dependencies {
   ...
   implementation("net.java.dev.jna:jna:5.13.0@aar")
   ...
}
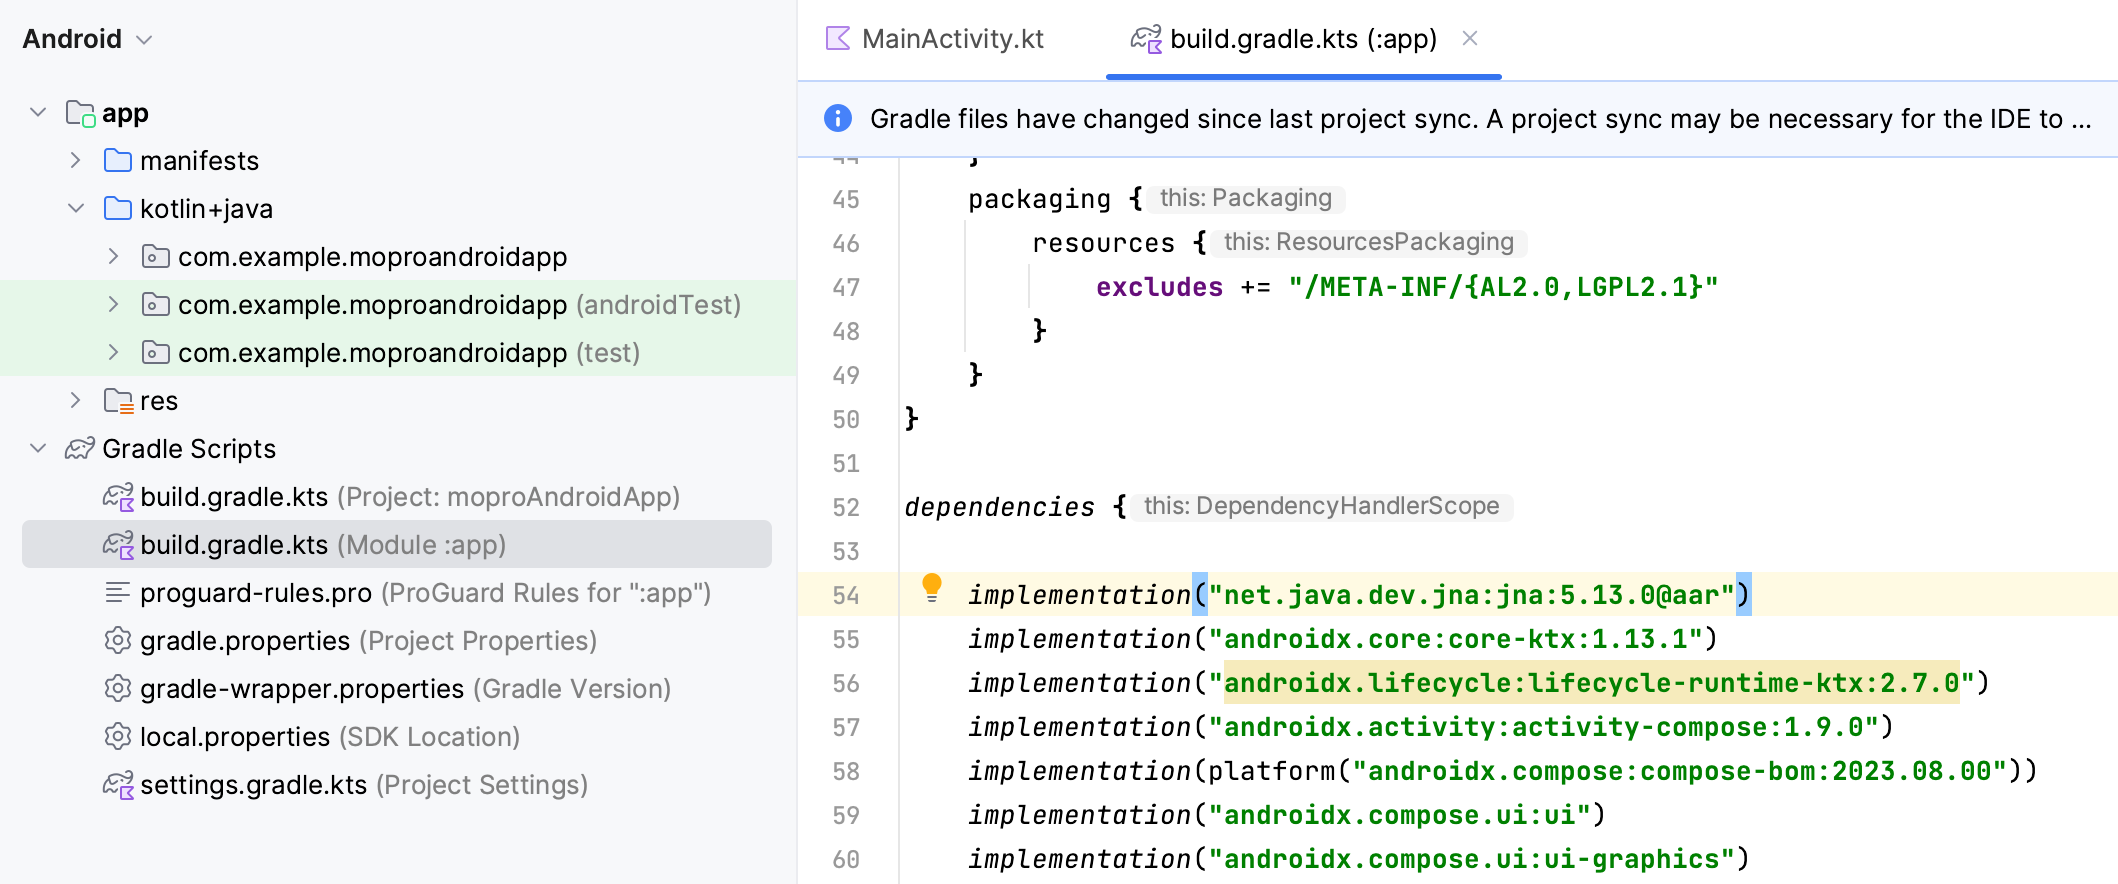
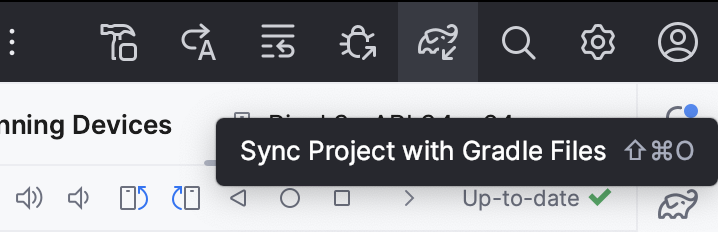
Sync gradle with File -> Sync Project with Gradle Files, or press
2. Add the MoproAndroidBindings folder into the project
Copy folders:
-
Move the
MoproAndroidBindings/jniLibs/folder intoapp/src/main/jniLibs/. For example:cp -r MoproAndroidBindings/jniLibs android/app/src/main -
Move the
MoproAndroidBindings/uniffi/mopro/mopro.ktsfile intoapp/src/main/java/uniffi/mopro/mopro.kt. For example:cp -r MoproAndroidBindings/uniffi android/app/src/main/java
The folder structure will be like
├── main
│   ├── AndroidManifest.xml
│   ├── java
│   │   ├── com
│   │   │   └── example
│   │   │       └── YOUR_APP
│   │   └── uniffi
│   │       └── mopro
│   │           └── mopro.kt
│   ├── jniLibs
│   │   ├── arm64-v8a
│   │   ├── armeabi-v7a
│   │   ├── x86
│   │   └── x86_64
│   ...
3. Place proving keys into the project
Create an asset folder: File -> New -> Folder -> Assets Folder.
Paste the keys in the assets folder.
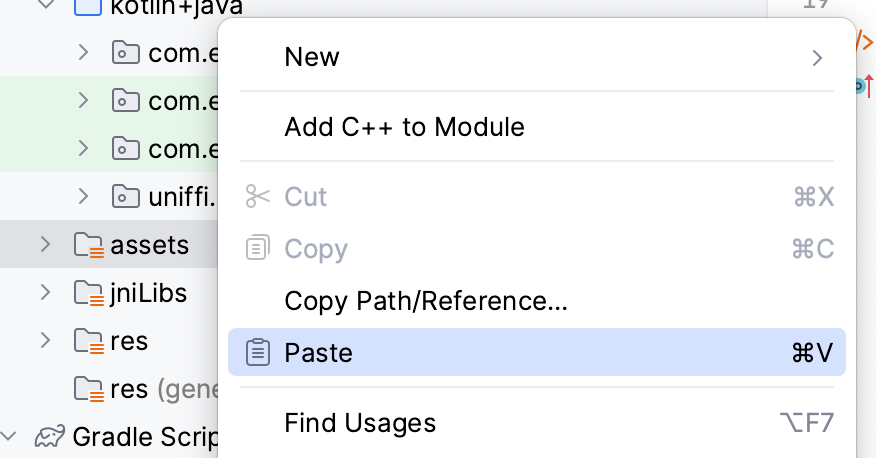
Although relative paths may work locally in Rust, the proving keys should be copied into the project to ensure they are accessible by the mobile app.
4. Proving from the app
In your project, there should be a file named MainActivity.kt
It should be under app/src/main/java/com/example/YOUR_APP/MainActivity.kt
Import the following boilerplate functions:
import androidx.compose.runtime.*
import android.content.Context
import androidx.compose.foundation.layout.Column
import androidx.compose.foundation.layout.padding
import androidx.compose.ui.unit.dp
import androidx.compose.material3.Button
import androidx.compose.material3.MaterialTheme
import androidx.compose.material3.Surface
import kotlinx.coroutines.launch
import java.io.File
import java.io.FileOutputStream
import java.io.IOException
Then, import the uniffi.<PROJECT_NAME> package that contains the generated bindings for your project. Replace <PROJECT_NAME> with the name of your project, which is usually the same as the Rust crate name, with - replaced by _. For example, if your Rust crate is named mopro-example, the import would look like this:
import uniffi.mopro_example.*
This will make the proving functions generateCircomProof available in this module and also help to load zkey.
In the MainActivity.kt, make your setContent function look like this:
    setContent {
        // A surface container using the 'background' color from the theme
        Surface(
            modifier = Modifier.fillMaxSize(),
            color = MaterialTheme.colorScheme.background
        ) {
            MainScreen(this)
        }
    }
Add a private function to load zkey. It is used to copy a file from the app's assets directory to the app's internal storage so that we can read the path of the zkey file.
private fun copyAssetToInternalStorage(context: Context, assetFileName: String): String? {
    val file = File(context.filesDir, assetFileName)
    return try {
        context.assets.open(assetFileName).use { inputStream ->
            FileOutputStream(file).use { outputStream ->
                val buffer = ByteArray(1024)
                var length: Int
                while (inputStream.read(buffer).also { length = it } > 0) {
                    outputStream.write(buffer, 0, length)
                }
                outputStream.flush()
            }
        }
        file.absolutePath
    } catch (e: IOException) {
        e.printStackTrace()
        null
    }
}
At the bottom of this file we'll create a view with a function to generate a proof. In this example we're going to prove a simple circuit that accepts two inputs named a and b and generates an output c.
@Composable
fun MainScreen(context: Context) {
    val coroutineScope = rememberCoroutineScope()
    var res by remember { mutableStateOf( "Proof: ") }

    Column(
        modifier = Modifier
            .fillMaxSize()
            .padding(16.dp)
    ) {
        Button(onClick = {
            coroutineScope.launch {
                val assetFilePath = copyAssetToInternalStorage(context, "multiplier2_final.zkey")
                assetFilePath?.let { path ->
                    val input_str: String = "{\"b\":[\"5\"],\"a\":[\"3\"]}"
                    res = generateCircomProof(path, input_str, ProofLib.ARKWORKS).toString()
                    println(res)
                }
            }
        }) {
            Text(text = "Generate Proof")
        }
        Text(text=res)
    }
}
Details
Full MainActivity.kt (simplified)
% TODO - update this to custom project namepackage com.example.moproandroidapp // Your application ID
import android.content.Context
import android.os.Bundle
import androidx.activity.ComponentActivity
import androidx.activity.compose.setContent
import androidx.activity.enableEdgeToEdge
import androidx.compose.foundation.layout.Column
import androidx.compose.foundation.layout.fillMaxSize
import androidx.compose.foundation.layout.padding
import androidx.compose.material3.Button
import androidx.compose.material3.MaterialTheme
import androidx.compose.material3.Surface
import androidx.compose.material3.Text
import androidx.compose.runtime.*
import androidx.compose.ui.Modifier
import androidx.compose.ui.unit.dp
import java.io.File
import java.io.FileOutputStream
import java.io.IOException
import kotlinx.coroutines.launch
import uniffi.<PROJECT_NAME>.*
class MainActivity : ComponentActivity() {
override fun onCreate(savedInstanceState: Bundle?) {
super.onCreate(savedInstanceState)
setContent {
// A surface container using the 'background' color from the theme
Surface(
modifier = Modifier.fillMaxSize(),
color = MaterialTheme.colorScheme.background
) { MainScreen(this) }
}
}
}
@Composable
fun MainScreen(context: Context) {
val coroutineScope = rememberCoroutineScope()
var res by remember {
mutableStateOf(
"Proof: "
)
}
Column(
modifier = Modifier
.fillMaxSize()
.padding(16.dp)
) {
Button(onClick = {
coroutineScope.launch {
val assetFilePath = copyAssetToInternalStorage(context, "multiplier2_final.zkey")
assetFilePath?.let { path ->
val input_str: String = "{\"b\":[\"5\"],\"a\":[\"3\"]}"
res = generateCircomProof(path, input_str, ProofLib.ARKWORKS).toString()
println(res)
}
}
}) {
Text(text = "Generate Proof")
}
Text(text=res)
}
}
private fun copyAssetToInternalStorage(context: Context, assetFileName: String): String? {
val file = File(context.filesDir, assetFileName)
return try {
context.assets.open(assetFileName).use { inputStream ->
FileOutputStream(file).use { outputStream ->
val buffer = ByteArray(1024)
var length: Int
while (inputStream.read(buffer).also { length = it } > 0) {
outputStream.write(buffer, 0, length)
}
outputStream.flush()
}
}
file.absolutePath
} catch (e: IOException) {
e.printStackTrace()
null
}
}
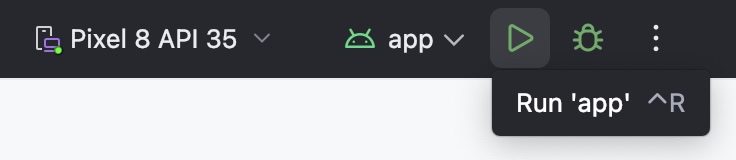
You should now be able to run the Android app (^+R or ctrl+R) on the simulator or a device and build a proof. The app should log the proof. For a more complete example including other provers and verification check here.
5. What's next?
-
Update your ZK circuits as needed. After making changes, be sure to run:
mopro build
mopro update --dest ../MyAndroidAppwarningmopro updateonly works if the Android project was created within the Rust project directory during mopro init. Otherwise, you can manually update the bindings by following Step 2.This ensures the bindings are regenerated and reflect your latest updates.
-
Build your mobile app frontend according to your business logic and user flow.
-
Expose additional Rust functionality: If a function is missing in Swift, Kotlin, React Native, or Flutter, you can:
- Add the required Rust crate in
Cargo.toml - Annotate your function with
#[uniffi::export](See the Rust setup guide for details).
Once exported, the function will be available across all supported platforms.
- Add the required Rust crate in
6. Importing multiple bindings
Adding two or more Mopro-generated bindings directly into one Android project will cause conflicts due to duplicate package names.
To resolve this:
-
Rename Kotlin binding files
For each binding, renamemopro.ktto something unique (e.g.MyLibraryA.kt).
At the top of the file, change thepackage uniffi.moproline to a unique name (e.g.uniffi.mylibrarya). -
Merge JNI libraries
Combine.sofiles from each separate binding into a singlejniLibsfolder, keeping all architectures (e.g.arm64-v8a,x86_64).
Ensure each.sohas a unique name to prevent overwriting. -
Adjust your imports
Use the new package names to import each binding module without conflicts. -
Repeat steps 1–3 for each additional binding (
MyLibraryB,MyLibraryC, …).
Ensure each binding was generated from a distinct Mopro project with a unique name.
You can now include multiple bindings in the same project without symbol or package collisions.